An IoT Weather Station
An IoT Weather Station
I recently bought an Arduino MKR Wi-Fi 1010 and decided to build a small IoT device using the Arduino IoT Cloud. Since I have DHT 11 sensor lying around at home I decided to build a simple weather station. The temperature sensor is connected to the Arduino and the Arduino connects over my Wi-Fi at home to the Internet and provides information on temperature, humidity, and the heat index.
First Impressions
Going from 0 to the first data points on the web view was surprisingly simple.
- Basically you can do everything in the web interface.
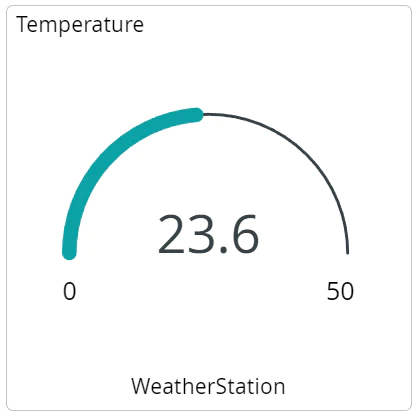
- Creating a dashboard is extremely easy. See below for a screenshot of what I had after a few clicks.
- There’s an Android/Apple app. Getting the data on your smartphone is straightforward.

There were two places where I struggled a bit.
- I needed to install the Arduino Create Agent on my computer to be able to set up the hardware. It happened a few times that the connection to the Arduino Create Agent wasn’t working. Restarting the thing or simply waiting for a minute always solved the issue. Since I never got any kind of error message, I’m not sure what the issue was.
- The Arduino IoT Cloud Interface is not always intuitive. If I unplug my Arduino at the end of the day, how do I get it back into an online state? The only way that I can see is to re-add the device. Also, the online/offline indicator for the devices is not always fully up to date. I had my Arduino connected and happily sending data to the serial monitor, but the device was still listed as offline.
- If I use the Arduino IDE, I need to download and install a library to use the DHT 11 sensor. I’m not sure where the library comes from when I upload my sketch over the web interface.
The Source Code
The C++ code for the sketch is really simple. Note that the variables for the temperature and humidity need to be declared on the web frontend so that they are known to the widgets as well as the Arduino. Also, a lot of code is automatically generated for you. You just have to insert the parts where you read the data and set up the sensor.
/*
  Arduino IoT Cloud Variables description

  The following variables are automatically generated and updated when changes are made to the Thing

  float heatindex;
  float humidity;
  float temperature;

  Variables which are marked as READ/WRITE in the Cloud Thing will also have functions
  which are called when their values are changed from the Dashboard.
  These functions are generated with the Thing and added at the end of this sketch.
*/

#include "DHT.h"
#include "thingProperties.h"

namespace {
  constexpr uint8_t DHTPIN = 2;
  constexpr uint8_t DHTTYPE = DHT11;
  DHT dht(DHTPIN, DHTTYPE);
}

void setup() {
  // Initialize serial and wait for port to open:
  Serial.begin(9600);
  // This delay gives the chance to wait for a Serial Monitor without blocking if none is found
  delay(1500);

  // Defined in thingProperties.h
  initProperties();

  // Connect to Arduino IoT Cloud
  ArduinoCloud.begin(ArduinoIoTPreferredConnection);

  /*
     The following function allows you to obtain more information
     related to the state of network and IoT Cloud connection and errors
     the higher number the more granular information you’ll get.
     The default is 0 (only errors).
     Maximum is 4
 */
  setDebugMessageLevel(4);
  ArduinoCloud.printDebugInfo();

  pinMode(LED_BUILTIN, OUTPUT);

  dht.begin();
  Serial.println("Setup completed.");
}

void loop() {
  delay(2000);
  ArduinoCloud.update();

  humidity = dht.readHumidity();
  temperature = dht.readTemperature();
  if (isnan(humidity) || isnan(temperature))
  {
    Serial.println("Failed to read from DHT sensor!");
    Serial.println(humidity);
    Serial.println(temperature);
    return;
  }

  heatindex = dht.computeHeatIndex(temperature, humidity, false);
  Serial.print("Humidity: ");
  Serial.print(humidity);
  Serial.println("%");

  Serial.print("Temperature: ");
  Serial.print(temperature);
  Serial.println(" degrees");

  Serial.print("Heat index: ");
  Serial.println(heatindex);
  return;
}
Notes
